RabbitMQ初探
RabbitMQ
参考链接
RabbitMQ六种工作模式详解_rabbitmq工作模式-CSDN博客
AMQP
信息传递链中,传递消息为上游,接收消息为下游
消息队列(Message Queue,MQ),队列,消息 先进先出
高级消息队列协议(Advanced Message Queue Protocol,AMQP)
- 一种开放的消息中间件协议,用于在分布式系统之间进行消息的发送和接收。它定义了消息的格式、路由和传输机制,旨在实现不同系统之间的互操作性(Answer by ChatGPT)
- RabbitMQ 是一个基于 AMQP 的消息代理(消息中间件),它实现了 AMQP 协议,并提供了一系列相应的功能和特性(Answer by ChatGPT)
- AMQP 0-9-1 Model Explained | RabbitMQ ~ AMQP 0-9-1 模型解释 | RabbitMQ
MQ的作用
[MQ作用的详细解释——04-RabbitMQ 高级教程 - 姜源の云笔记 (janycode.github.io)](https://janycode.github.io/2021/08/17/08_框架技术/07_RabbitMQ/04-RabbitMQ 高级教程/index.html#1-2-为什么要用-MQ)
流量削峰
应用解耦
异步处理
广播
MQ的分类
MQ的分类详讲 - 04-RabbitMQ 高级教程 - 姜源の云笔记
ActiveMQ
Kafka
RocketMQ
RabbitMQ
RabbitMQ
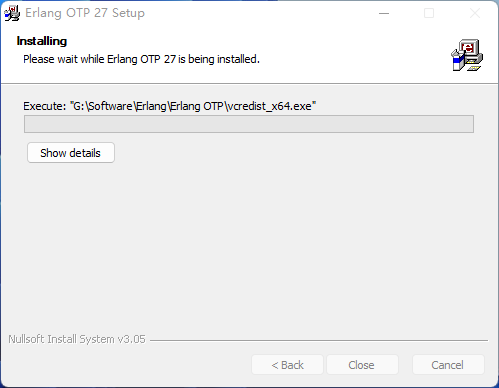
RabbitMQ安装
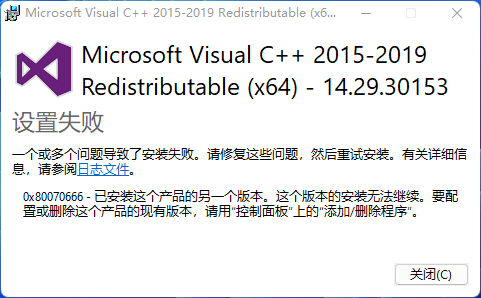
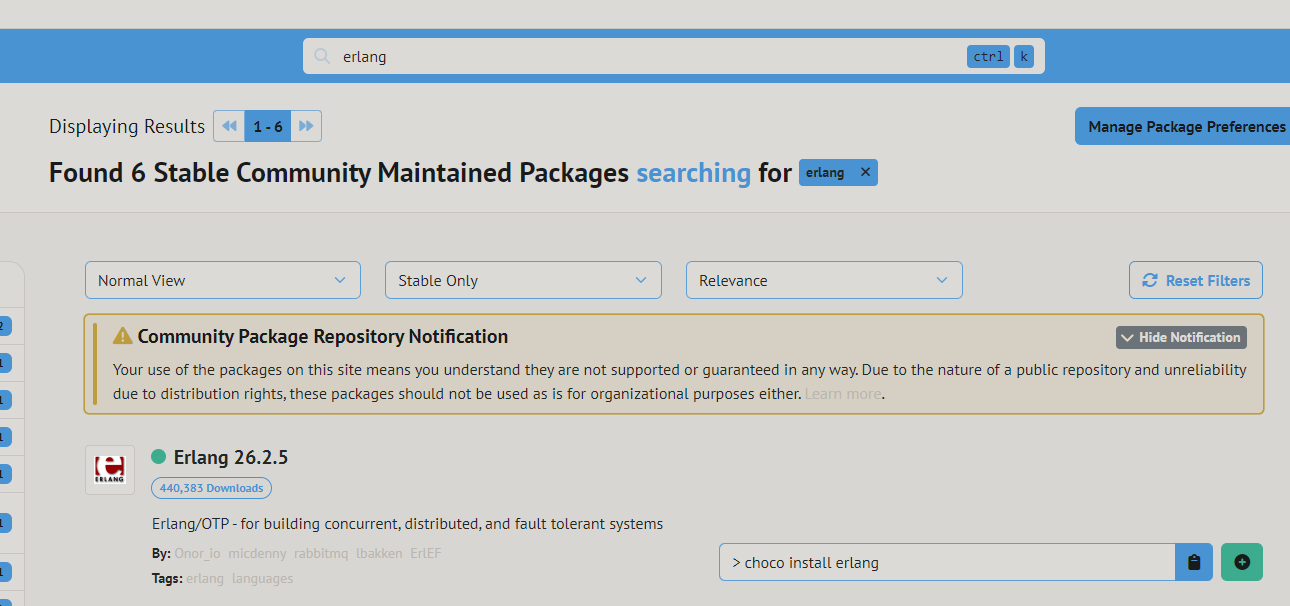
Erlang安装(用Chocolatey安装RabbitMQ可直接跳过Erlang安装RabbitMQ)
https://erlang.org/download/otp_versions_tree.html
貌似也能用过Chocolatey
安装Rabbit MQ
https://www.rabbitmq.com/install-windows.html
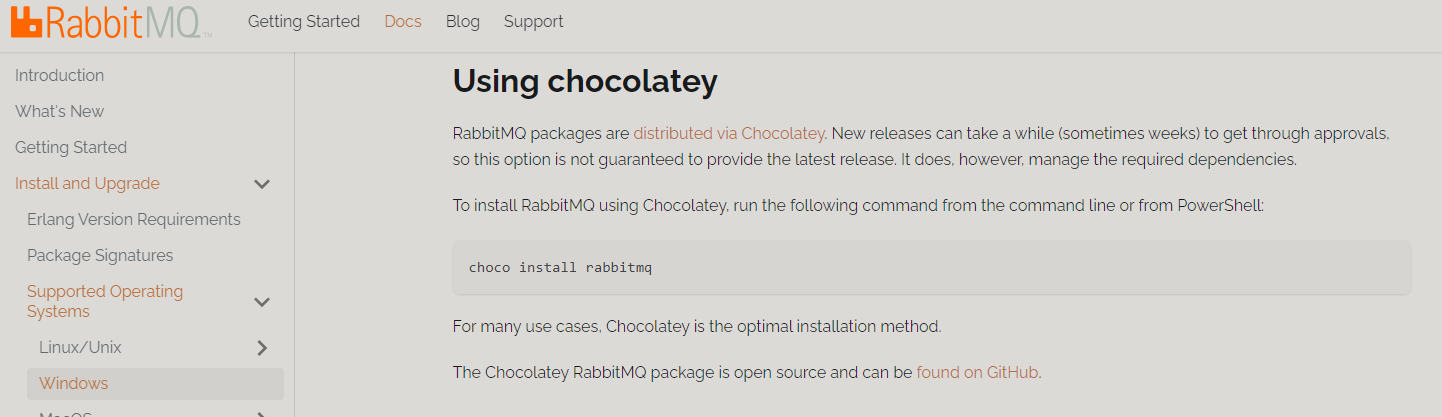
使用Chocolatey安装
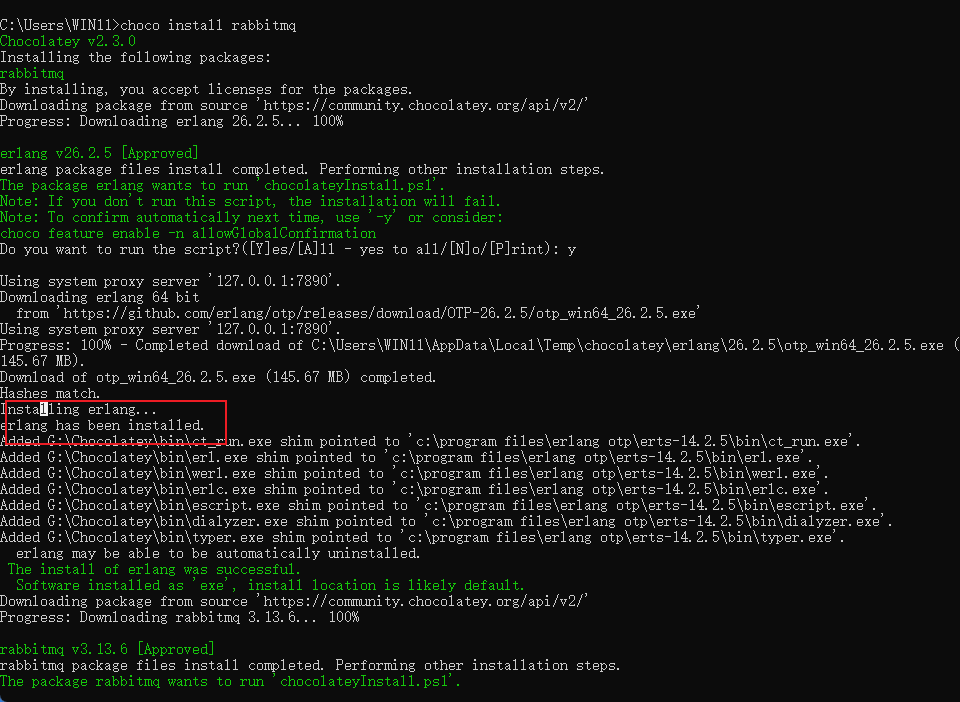
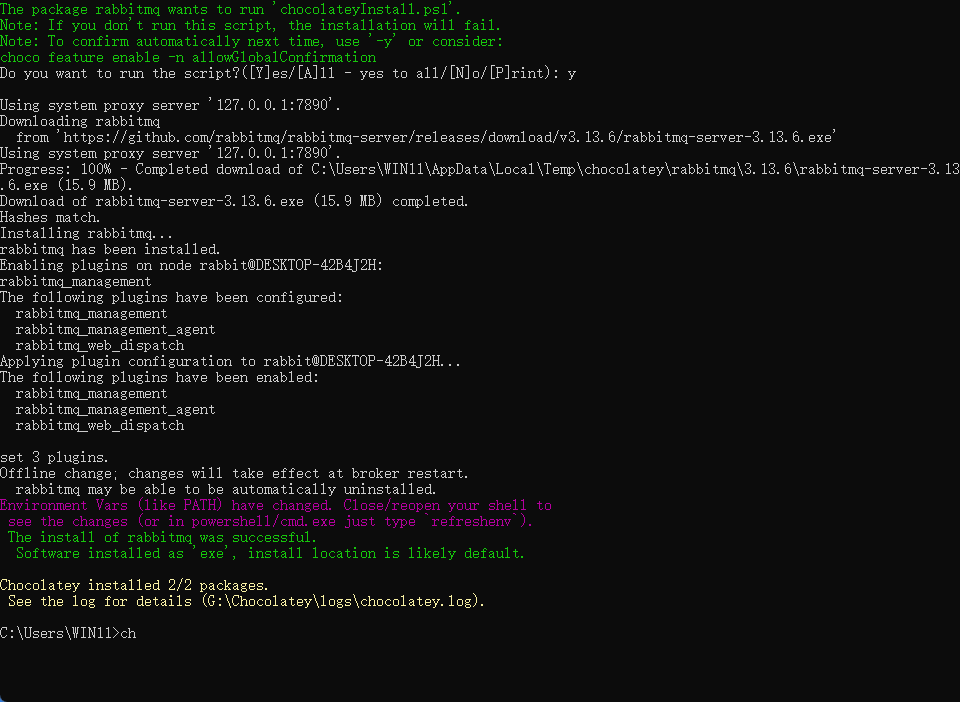
貌似Erlang又装了一遍...
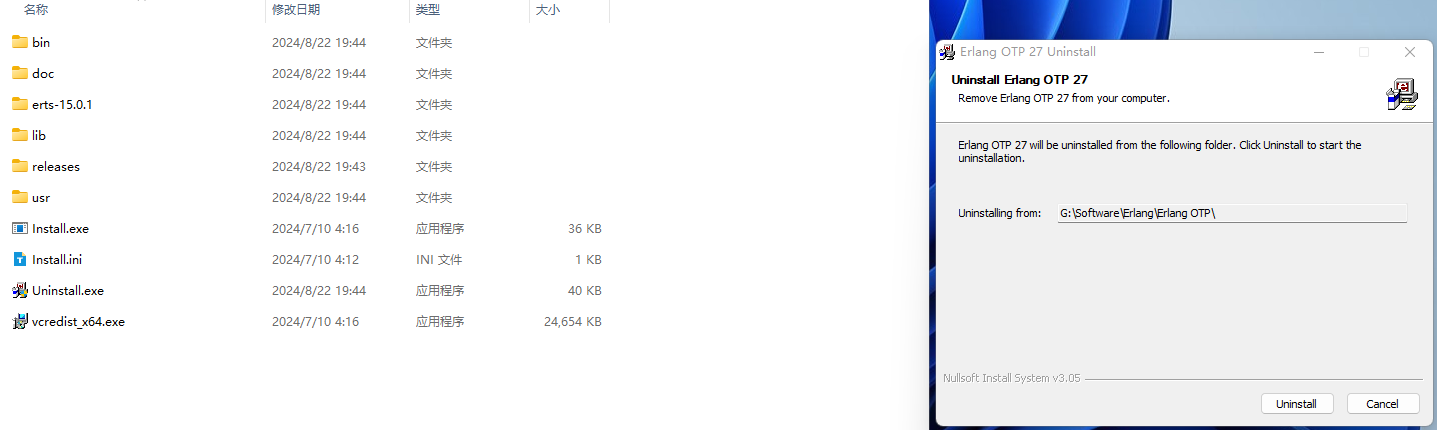
删除原先的Erlang
打开 RabbitMQ Command Prompt (sbin dir) 输入 rabbitmqctl.bat status 来确认 RabbitMQ 的启动状态
报错了...
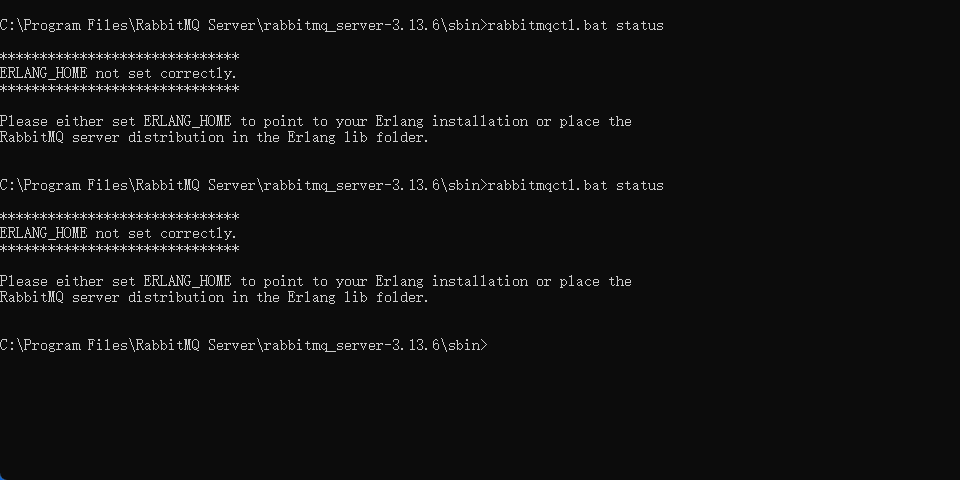
环境变量出问题了,指向原先卸载的路径

修改环境路径
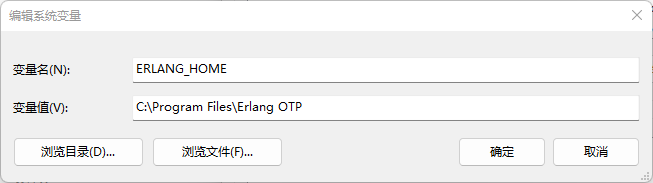
还是报错
C:\Program Files\RabbitMQ Server\rabbitmq_server-3.13.6\sbin>rabbitmqctl.bat status
Error: unable to perform an operation on node 'rabbit@DESKTOP-42B4J2H'. Please see diagnostics information and suggestions below.
Most common reasons for this are:
* Target node is unreachable (e.g. due to hostname resolution, TCP connection or firewall issues)
* CLI tool fails to authenticate with the server (e.g. due to CLI tool's Erlang cookie not matching that of the server)
* Target node is not running
In addition to the diagnostics info below:
* See the CLI, clustering and networking guides on https://rabbitmq.com/documentation.html to learn more
* Consult server logs on node rabbit@DESKTOP-42B4J2H
* If target node is configured to use long node names, don't forget to use --longnames with CLI tools
DIAGNOSTICS
===========
attempted to contact: ['rabbit@DESKTOP-42B4J2H']
rabbit@DESKTOP-42B4J2H:
* connected to epmd (port 4369) on DESKTOP-42B4J2H
* epmd reports: node 'rabbit' not running at all
no other nodes on DESKTOP-42B4J2H
* suggestion: start the node
Current node details:
* node name: 'rabbitmqcli-20-rabbit@DESKTOP-42B4J2H'
* effective user's home directory: c:/Users/WIN11
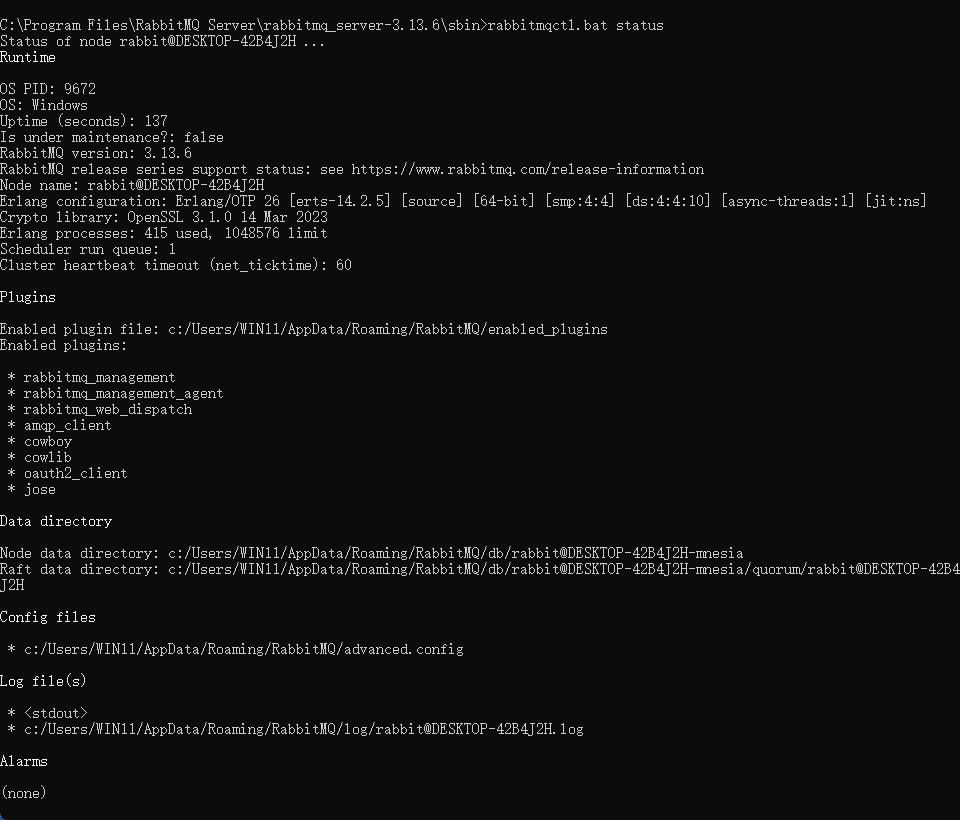
* Erlang cookie hash: rzge9A98Fk+Pr2fBfdq6CQ==使用 choco uninstall rabbitmq 以及 choco uninstall erlang,重新安装一遍
成功了,显示PID等信息了
启用客户端管理的UI插件
rabbitmq-plugins enable rabbitmq_managementRabbitMQ简单配置
默认用户名 / 密码:guest
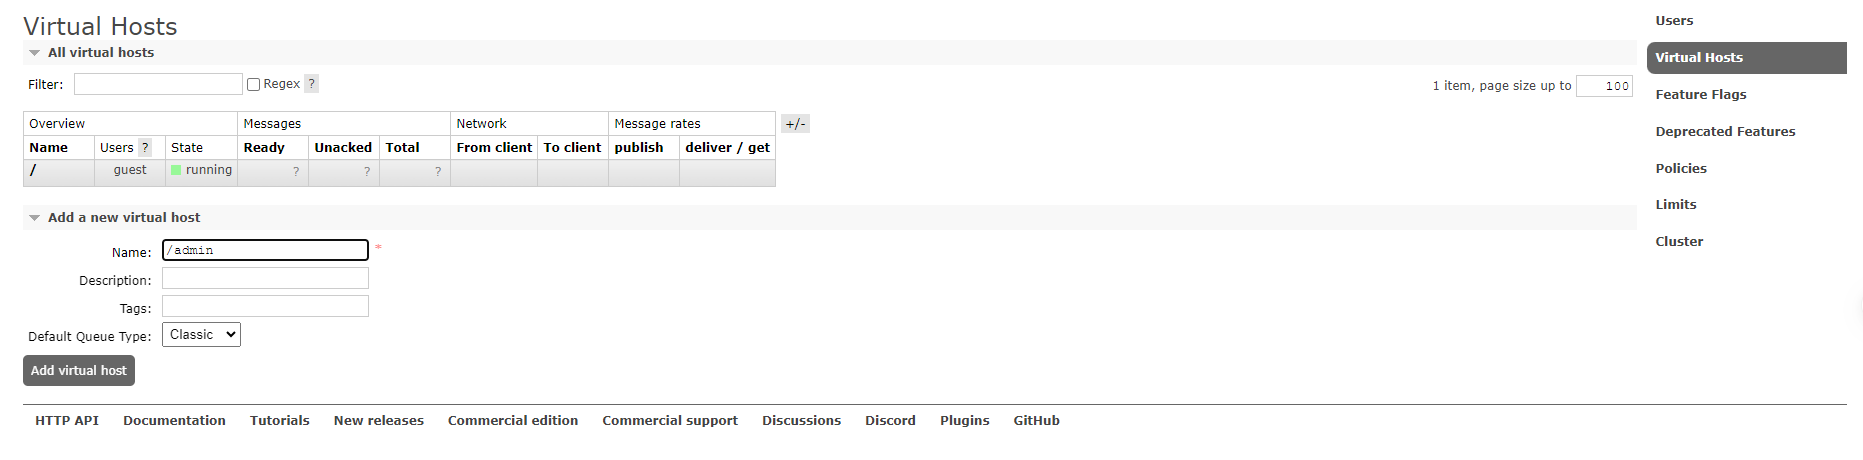
新建一个VirtualHosts
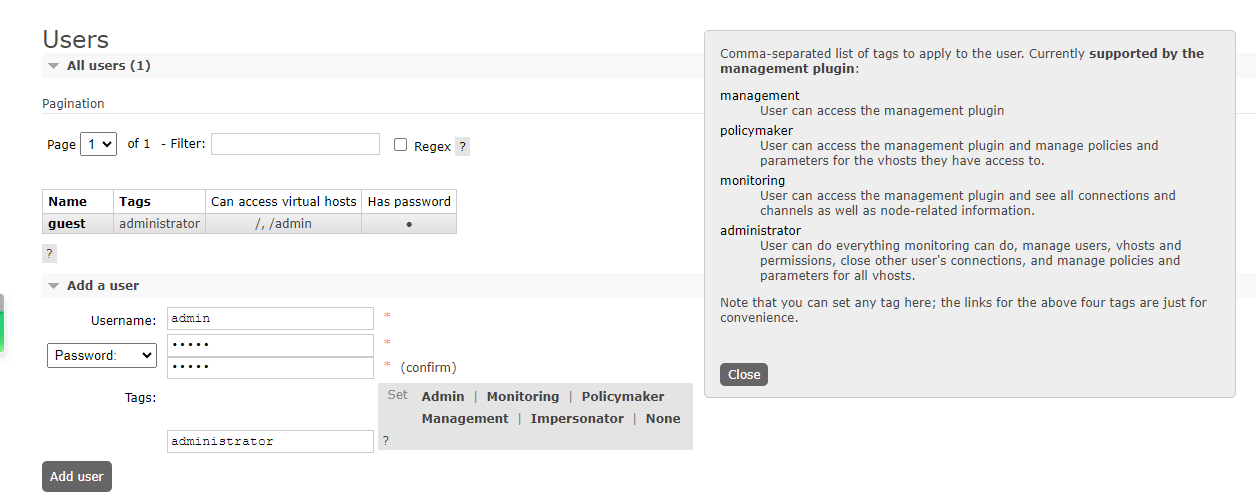
新建一个User
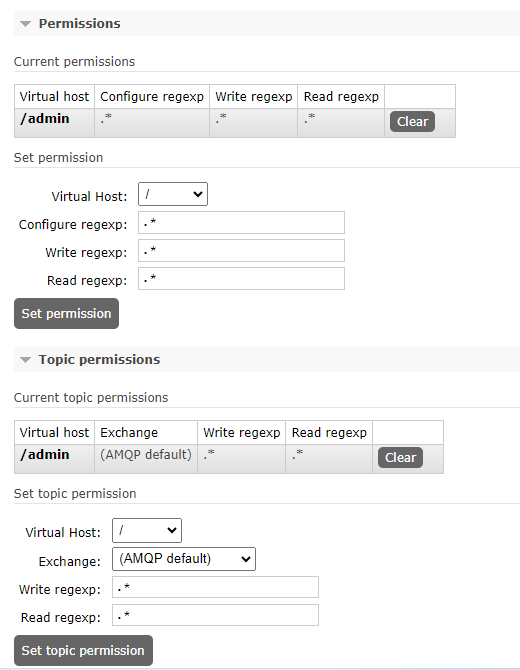
设置User在 VirtualHosts :/admin 的权限
核心概念
[核心概念的解释——04-RabbitMQ 高级教程 - 姜源の云笔记 (janycode.github.io)](https://janycode.github.io/2021/08/17/08_框架技术/07_RabbitMQ/04-RabbitMQ 高级教程/index.html#2-2-四大核心概念)
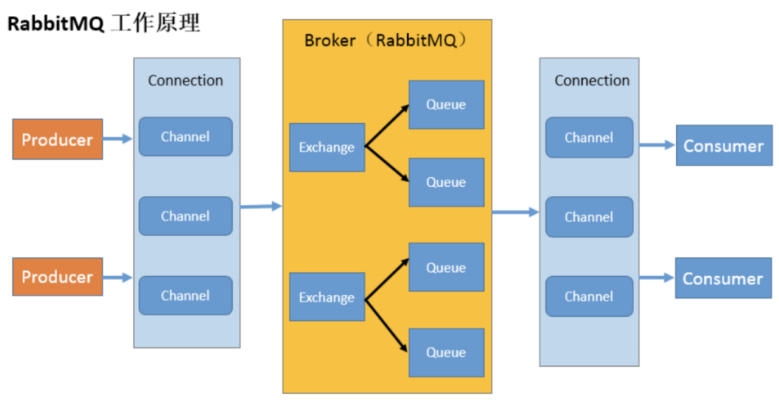
生产者 (Producer):生产消息
交换机(Exchange):转发消息,本身并不存储消息
队列(Queue):消息缓冲区
消费者(Consumer):消费消息
Broker
Connection:producer / cosumer 与 broker 之间的 TCP 连接
Channel:在connection内部建立的逻辑连接
Binding:exchange和queue之间的虚拟连接
AMQP模型
AMQP 0-9-1 Model Explained | RabbitMQ
The AMQP 0-9-1 Model has the following view of the world: messages are published to exchanges, which are often compared to post offices or mailboxes. Exchanges then distribute message copies to queues using rules called bindings. Then the broker either deliver messages to consumers subscribed to queues, or consumers fetch/pull messages from queues on demand.
AMQP 0-9-1 模型具有以下世界观:消息发布到交换器,交换器通常与邮局或邮箱进行比较。然后,交换器使用称为绑定的规则将消息副本分发到队列。然后,代理要么将消息传递给订阅队列的消费者,要么消费者按需从队列中获取/拉取消息。
Exchange类型
AMQP 0-9-1 Model Explained | RabbitMQ ~ AMQP 0-9-1 模型解释 | RabbitMQ
Direct
Fanout
Topic
Headers(用得少)
Queues
AMQP 0-9-1 Model Explained | RabbitMQ ~ AMQP 0-9-1 模型解释 | RabbitMQ
- Name
- Durable
Bindings
AMQP 0-9-1 Model Explained | RabbitMQ ~ AMQP 0-9-1 模型解释 | RabbitMQ
Bindings are rules that exchanges use (among other things) to route messages to queues.
- Queue
- Exchange
Consumer
AMQP 0-9-1 Model Explained | RabbitMQ ~ AMQP 0-9-1 模型解释 | RabbitMQ
- Message Acknowledgements
- Rejecting Message
- Negative Message
- Prefetching Message
RabbitMQ 工作模式
RabbitMQ Tutorials | RabbitMQ - 有配图有讲解
1.简单模式
一个生产者,一个消费者
2.工作队列模式
一个生产者,多个消费者
公平分发、不公平分发、Qos:RabbitMQ六种工作模式详解_rabbitmq工作模式-CSDN博客
3.发布订阅模式
Exchange type:FANOUT
将消息广播发送给每个队列
4.路由模式
Exchange type:DIRECT(定向)
比较 消息中的 Routing key 与 Binding 中的 Routing key,相等则发送到 Binding对应的Queue
5.主题模式
Exchange type:TOPIC
A few valid routing key examples: "stock.usd.nyse", "nyse.vmw", "quick.orange.rabbit".
通配符,* 代表一个单词,#代表零或多个单词
6.RPC模式
远程过程调用(Remote Procedure Call,RPC)
RabbitMQ tutorial - Remote procedure call (RPC) | RabbitMQ
消息分发
轮询分发
不公平分发
- channel.basicQos(n);
限流
消息确认
- 发布确认(生产者——交换机)
- 消息应答(消费者)
- channel.basicAck()
- channel.basicNack()
- channel.basicReject()
持久化
- 队列持久化
- 消息持久化
队列
- 死信队列
- 由于某些原因导致队列中的消息无法被消费(例如 消息的 TTL 过期、队列已满、消息被拒绝)
- 正常队列 与 死信队列 的绑定
- 延迟队列
- 队列 TTL / 消息 TTL + 死信队列
- 优先队列
- 队列 / 消息 优先级设置
- 惰性队列
- 尽可能将消息持久化到磁盘,消费者消费时才加载到内存
TTL——最大存活时间
- 队列 TTL
- 消息 TTL
幂等性
- 消费 可能存在 重复消费 问题
- 幂等性保障
SpringBoot整合Rabbit MQ
参考链接
Spring Boot 整合RabbitMQ (netfilx.github.io)
Springboot 整合RabbitMq ,用心看完这一篇就够了_springboot rabbitmq-CSDN博客
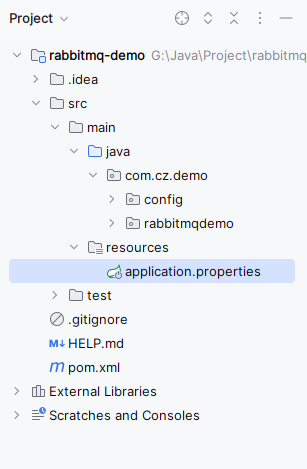
新建一个SpringBoot工程
引入依赖
<!-- https://mvnrepository.com/artifact/org.springframework.boot/spring-boot-starter-amqp -->
<dependency>
    <groupId>org.springframework.boot</groupId>
    <artifactId>spring-boot-starter-amqp</artifactId>
    <version>3.3.2</version>
</dependency>
记得Load maven changes

配置文件application.properties
#rabbitmq
spring.rabbitmq.host=127.0.0.1
# virtual host
spring.rabbitmq.virtual-host=/admin
spring.rabbitmq.port=5672
spring.rabbitmq.username=admin
spring.rabbitmq.password=admin
RabbitConfig
package com.cz.demo.config;

import org.springframework.amqp.core.Binding;
import org.springframework.amqp.core.BindingBuilder;
import org.springframework.amqp.core.DirectExchange;
import org.springframework.amqp.core.Queue;
import org.springframework.context.annotation.Bean;
import org.springframework.context.annotation.Configuration;

@Configuration
public class RabbitConfig {

    //队列
    @Bean
    public Queue queue() {
        return new Queue("queue");
    }
}
生产者
package com.cz.demo.mq;

import lombok.extern.slf4j.Slf4j;
import org.springframework.amqp.rabbit.core.RabbitTemplate;
import org.springframework.beans.factory.annotation.Autowired;
import org.springframework.stereotype.Component;

@Slf4j
@Component
public class Producer {

    @Autowired
    private RabbitTemplate rabbitTemplate;

    public void sendMessage() {
        String message = "Hello RabbitMQ";
        log.info("发送消息: {}", message);
        try {
            //注:这里少指定了routing key
            //正确语句:rabbitTemplate.convertAndSend("queue", message);
            rabbitTemplate.convertAndSend(message);
        } catch (Exception e) {
            log.error("send message error: {}", e.getMessage());
        }
    }
}
消费者
package com.cz.demo.mq;

import lombok.extern.slf4j.Slf4j;
import org.springframework.amqp.rabbit.annotation.RabbitHandler;
import org.springframework.amqp.rabbit.annotation.RabbitListener;
import org.springframework.stereotype.Component;

@Component
@RabbitListener(queues = "queue")
@Slf4j
public class Consumer {

    @RabbitHandler
    public void receive(String message){
        log.info("接收到消息: {}", message);
    }
}
测试
package com.cz.demo.test;

import com.cz.demo.mq.Producer;
import org.junit.jupiter.api.Test;
import org.springframework.beans.factory.annotation.Autowired;
import org.springframework.boot.test.context.SpringBootTest;


@SpringBootTest
public class RabbitmqTest {

    @Autowired
    private Producer producer;

    @Test
    public void send() {
        producer.sendMessage();
    }
}
开始Debug
发送消息后,打开RabbitMQ Management
受到 Springboot 整合RabbitMq ,用心看完这一篇就够了_springboot rabbitmq-CSDN博客 博客的启发,想到了可以运用 Debug + RabbitMQ Management 来查看队列中的消息
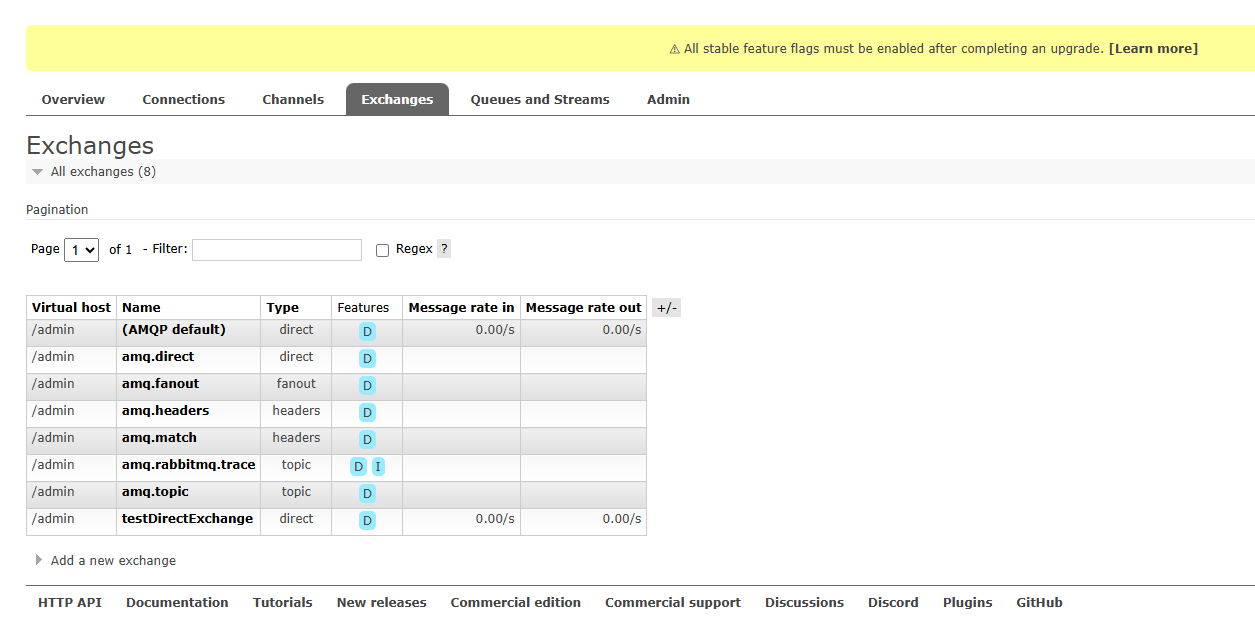
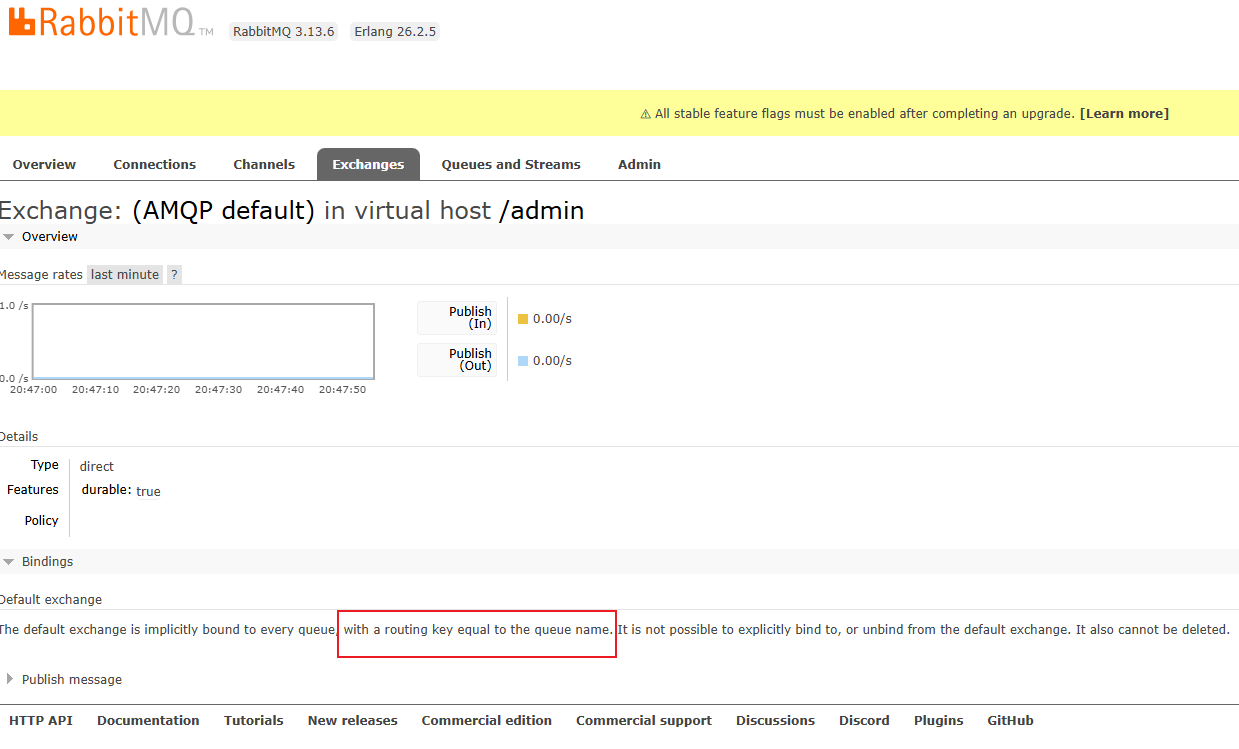
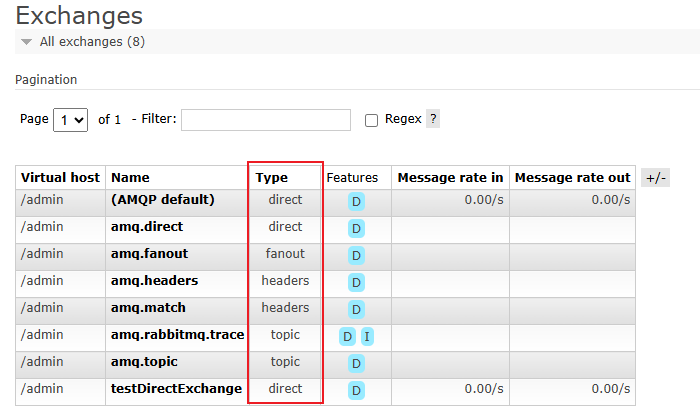
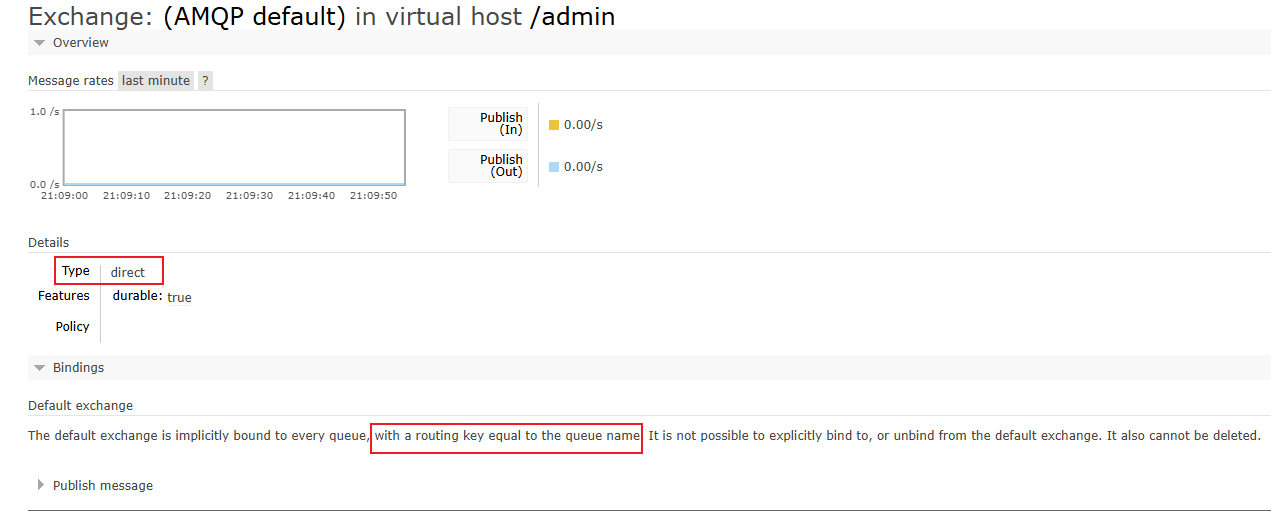
切换到默认的 Exchange(AMQP default)

切换到Queue界面
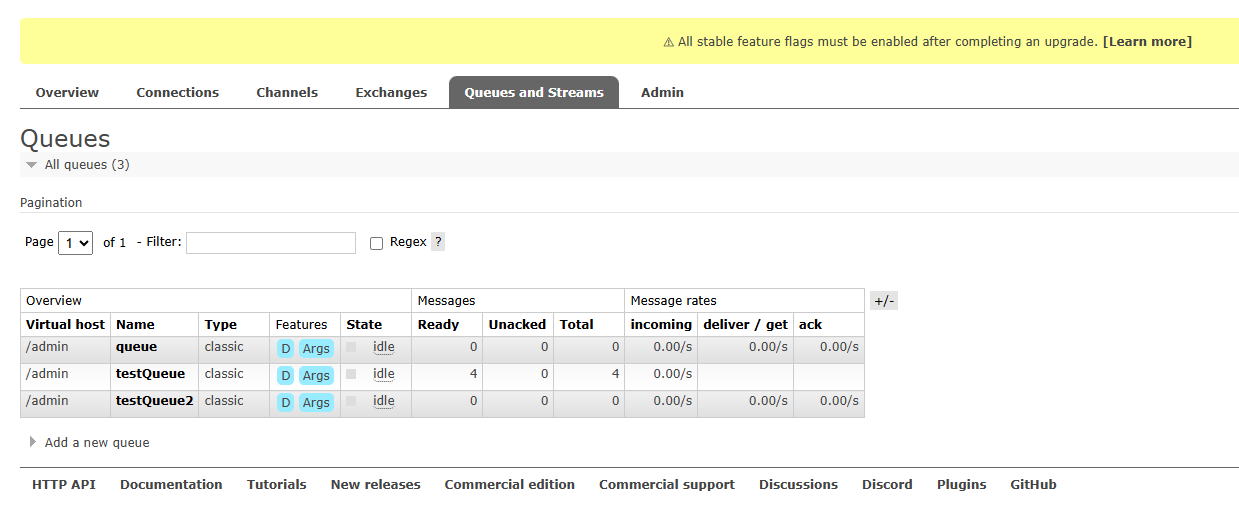
进入queue,并没有看到队列中有消息
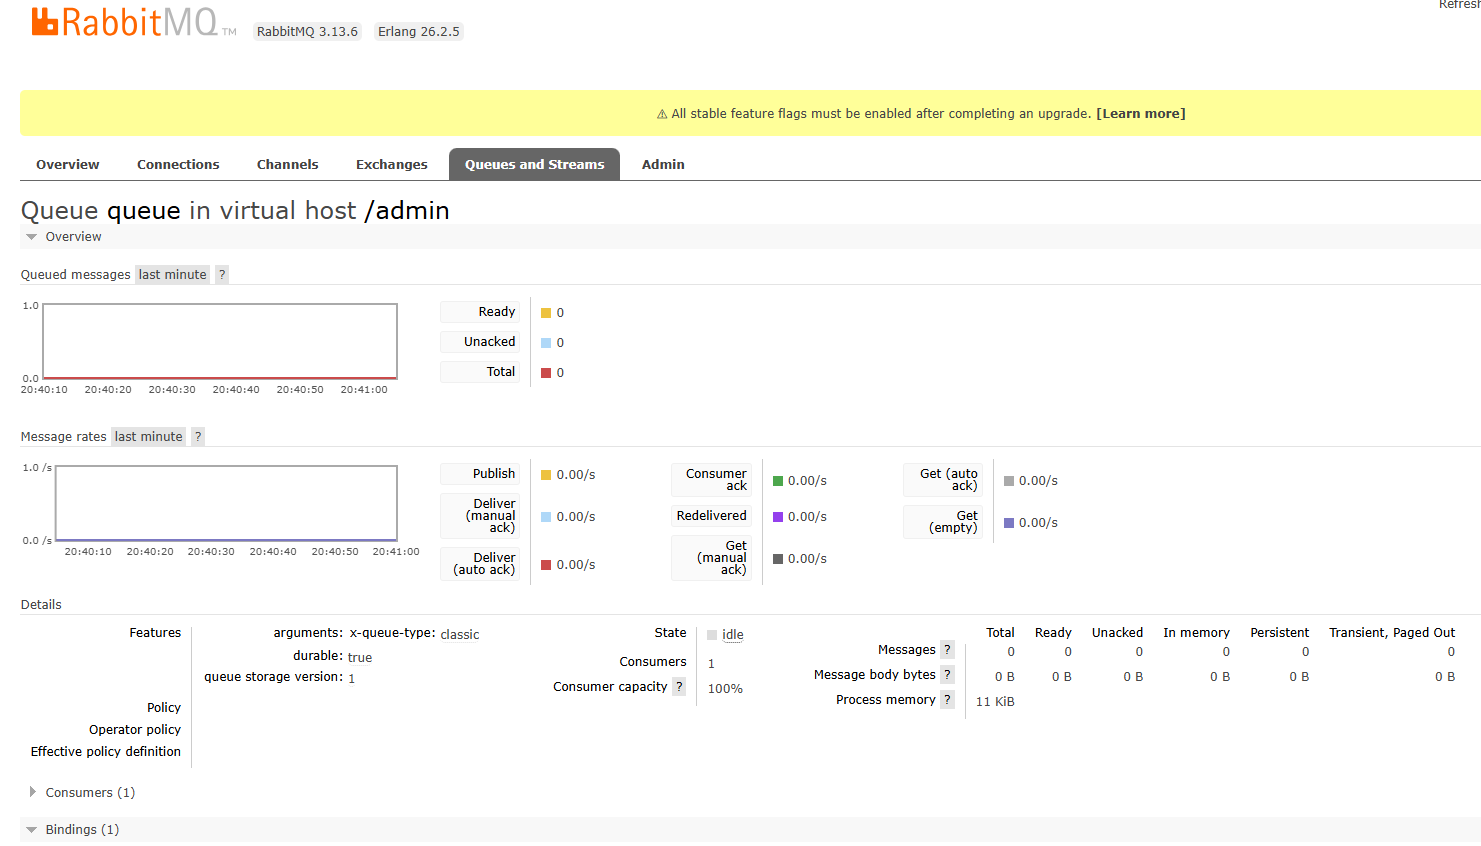
运行后,控制台并没有消费者输出的消息
问题
Exchange 和 queue 貌似没有匹配上?
进入 Exchange: (AMQP default) in virtual host /admin 中看到 Binding
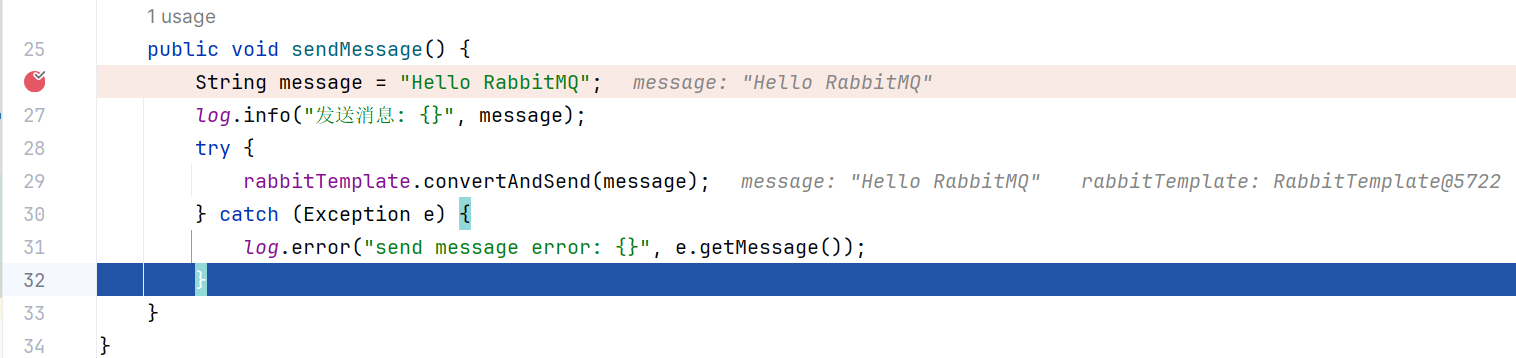
修改Producer.java,convertAndSend中加上routingKey
public void sendMessage() {
    String message = "Hello RabbitMQ";
    log.info("发送消息: {}", message);
    try {
        rabbitTemplate.convertAndSend("queue", message);
    } catch (Exception e) {
        log.error("send message error: {}", e.getMessage());
    }
}
重新测试,并在sendMessage() 中打断点
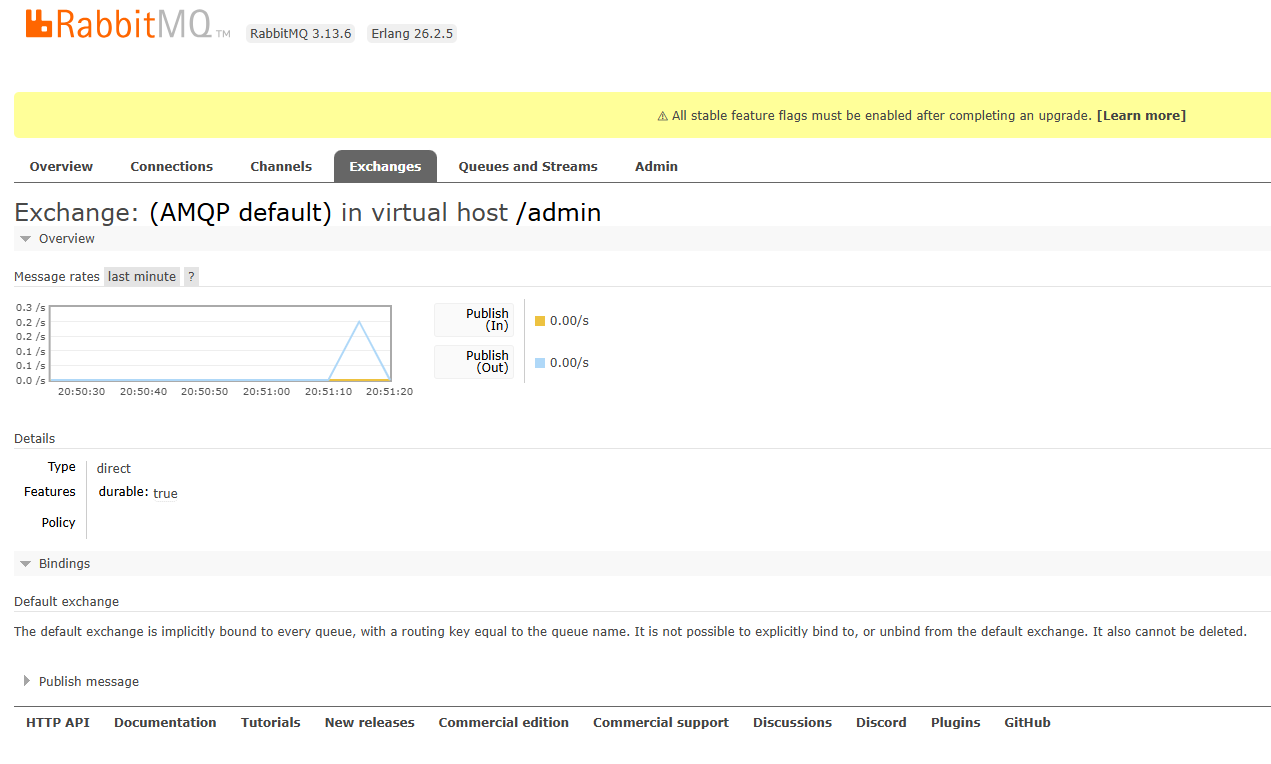
一样在发送消息后,消费者 消费 消息之前,回到 RabbitMQ Management 查看Exchange
然后,查看Queue中的queue,收到消息了
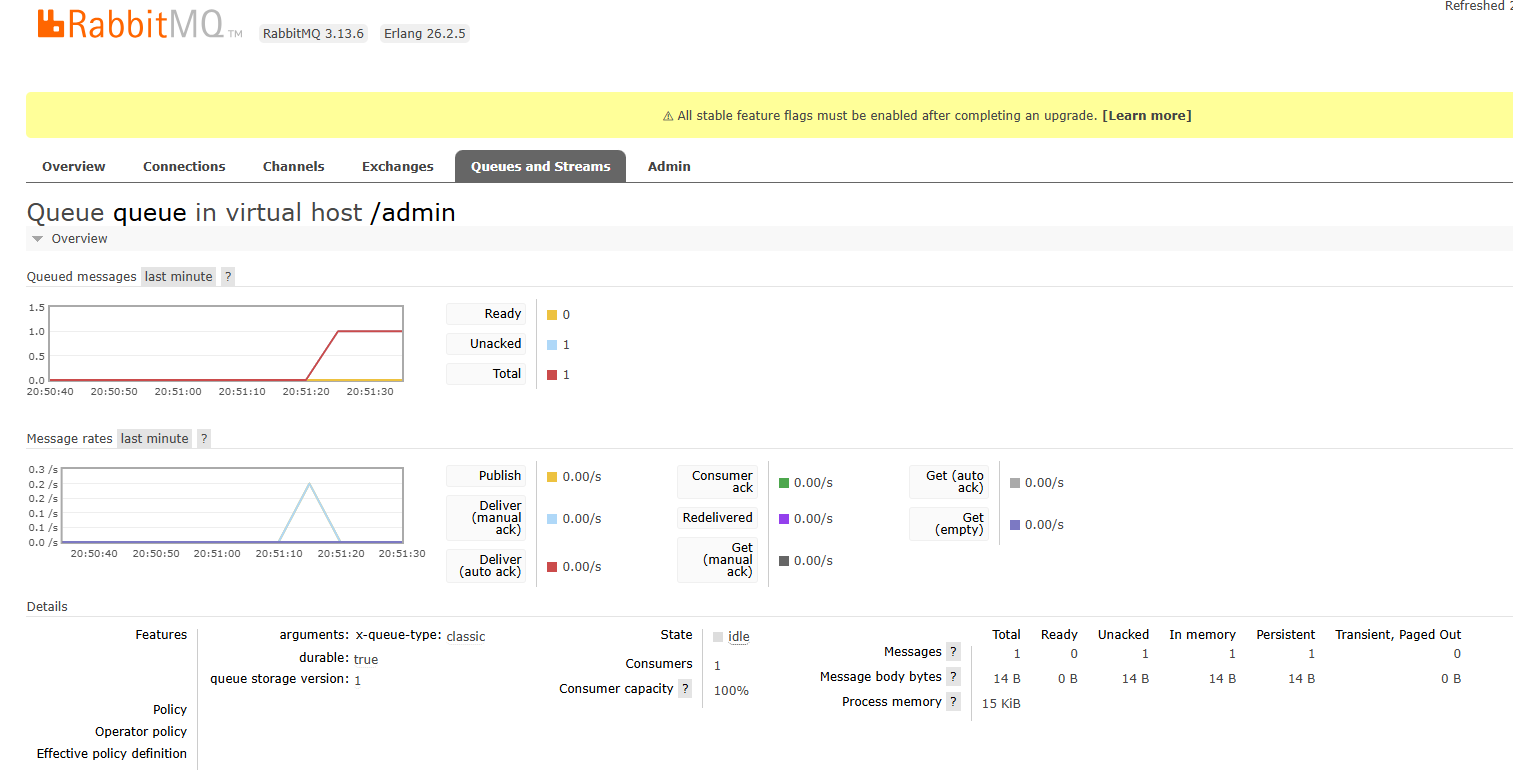
但是,控制台没有收到消息,可能跟 Debug 停留太久有关(纯猜测),重新运行,先消费之前在队列的消息,然后,接着消费此次运行生产的消息
问题所在
没有在RabbitConfig中指定Exchange时,采用默认的(AMOP default)Exchange,而默认的Exchange Type是Direct,routing key 默认为 Queue 名
尝试指定Exchange和routing key
RabbitConfig.java
	//队列
    @Bean
    public Queue queue() {
        return new Queue("testQueue3");
    }

    //交换机,路由模式
    @Bean
    DirectExchange testDirectExchange() {
        return new DirectExchange("testDirectExchange2", true, false);
    }

    //Binding,绑定队列和交换机
    @Bean
    Binding bindingDirect() {
        return BindingBuilder.bind(queue()).to(testDirectExchange()).with("testRoutingKey");
    }
Producer.java
public void send() {
    String message = "Hello RabbitMQ";
    log.info("send message: {}", message);
    try {
        rabbitTemplate.convertAndSend("testDirectExchange2","testRoutingKey", message);
    } catch (Exception e) {
        log.error("send message error: {}", e.getMessage());
    }
}
Consumer.java
@Component
@RabbitListener(queues = "testQueue3")
@Slf4j
public class Consumer {

    @RabbitHandler
    public void receive(String message){
        log.info("接收到消息: {}", message);
    }
}
RabbitTest.java
@Test
public void send2() {
    producer.send();
}